
So on we go with the second part of this tutorial.......
You will need
6x4 card
Stylized folder
The larger MFP (modifying folder pad)- see Part 1)
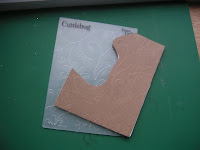
6x4 card
Stylized folder
The larger MFP (modifying folder pad)- see Part 1)
 Place card in folder with MFP over the pattern and emboss as before
 Your finished embossed card will look like this- If you want to see how I finished my card - pop over to ikki's corner - link on the side bar.
Having completed the embossing process of the 6 x 4 card, I going to take this idea on further and use the technique on a square card.
I used a 5.1/2 square card. Place the folder at the edge of your open card with the MFP positioned over the folder pattern and emboss . Keep hold of the MFP until the roller engages.

Now with the card open - place the folder towards the middle of the card lining up the pattern to the edge of the previous embossing. Unfortunately, although this piccy shows the folder in the right position - the folder SHOULD BE UPSIDE DOWN - CUTTLEBUG LOGO AT THE BOTTOM - (as we have done before) so you get the right pattern in the right place! It's that jet lag again (that's my excuse anyway).
 Place the small portion MFP over the folder pattern and emboss as usual, taking care to hold the MFP in place until it engages the roller.
Unfortunately, as you will see there is a small area where the pattern does not work out, but ... you can touch this up with a ball embossing pen.

To finished the card, I have lightly chalked the pattern so you can see it more clearly and added a simple nestie flower to cover the little inperfection.....what inperfection!!?? I also added a few gems - don't know why because they were not necessary and I don't like them, but I do like the scored lines - they finish the card off nicely.

You now have four patterns that you can create from the one folder - not bad for 4 quid($6)
I love a bargain!
Hope you enjoy this project, as always your views will be of great interest to me and I look forward to hearing from you all.
Happy Cuttling, I'll be back next week with something new - TFL and come back soon.

7 comments:
this is a fab Idea Eileen...cant wait to get some time to try both of these tuorials...you make it look so easy and explaing it in simple terms if you know what I mean..lol....Gald you had a lovely holiday too...hugs Jackie
this is a fab Idea Eileen...cant wait to get some time to try both of these tuorials...you make it look so easy and explaing it in simple terms if you know what I mean..lol....Gald you had a lovely holiday too...hugs Jackie
this is a fab Idea Eileen...cant wait to get some time to try both of these tuorials...you make it look so easy and explaing it in simple terms if you know what I mean..lol....Gald you had a lovely holiday too...hugs Jackie
Thanks for sharing I am just about to give it ago with my CB oh well perhaps later it appears its time for tea.I can't wait you have given me inspiration. Cheers Jeanie
Hi Wow Eileen this tutorial is fantastic, thanks so much for taking the time to do them. Take care Bernie xx (Lovecrafting)on docrafts
love this idea! you are sooo clever! thanks for sharing!
hugs from the Philippines,
sheene
hi Eileen, what a lovely idea, gosh! how do you think of all these super ideas, again like the step by step instructions very clear to understand super thanx for sharing with us julie x (DC)
Post a Comment